Integrating Phoenix LiveView with JavaScript and AlpineJS
A common pitch for Phoenix LiveView is it allows you to create modern reactive apps without having to write JavaScript. In large part that is true. You can create dynamic server-rendered apps all in Elixir without having to write a large portion of your app in JavaScript frameworks such as React, Angular, or Vue.js. But, even so, you will still need to write a smattering of JavaScript if you want your app to have the fit and finish of a finely crafted web app. And that makes sense, as this is exactly what JavaScript was created to do.
Where JavaScript shines is in providing quick response to client actions that don’t require a server roundtrip to perform and in transitions, such as opening a dropdown with a nice animation from the closed to open state and back.
Where LiveView and JavaScript meet is what this article is about. We will discuss how LiveViews and LiveComponents can communicate with JavaScript code and vice versa. Our tools will be LiveView’s JavaScript hooks, AlpineJS and Spruce.
In this article, we will go through a set of simple contrived examples so we can focus on the mechanisms involved. In a follow on article, we will walk through the implementation of a modal using LiveView, AlpineJS, and Tailwind CSS.
We are going to assume you have some LiveView experience. If you are just getting started with LiveView, I would recommend the LiveView courses from Grox.io and Pragmatic Studio.
LiveView JavaScript Hooks #
LiveView JavaScript hooks allow us to register JavaScript lifecycle callbacks on DOM nodes, including script, template and hidden elements. The hooks get called when the node is mounted, about to be updated, updated, about to be destroyed, destroyed, disconnected, and reconnected. The hook has access to the DOM element on which it is registered, the view name, and functions to push events to the server LiveView or Stateful LiveComponents.
A hook is a full-blown JavaScript object, meaning that, beyond the hook callbacks, it can have its own state and methods.
The most commonly used lifecycle callbacks are mount and updated. The mount callback is called when the element associated with the hook is initially mounted in the DOM, it is a constructor of sorts. It is often used to initialize state and register event handlers.
The updated callback is called anytime the DOM element it is associated with changes. A common pattern is to associate a LiveView assign with an attribute on the DOM node, such that every time the assign is updated, the hook’s updated function will be called. This can be used to signal the hook to take some action.
The documentation is pretty self-explanatory, so we won’t spend much time on hooks here, but let’s take a look at a couple of examples from an app I am developing.
BeforeUnload Hook #
The BeforeUnload hook registers a beforeunload JavaScript event handler on mount that will be called when the page is about to be unloaded. This gives us the opportunity to prompt the user if they have unsaved changes and blocks the unload if the user decides to stay.
We attach our hook to a DOM node by assigning the hook name to a ‘phx-hook` attribute in our LiveView markup.
<div id="edit"
     phx-hook="BeforeUnload"
     data-changes-made="<%= !Enum.empty?(@changeset.changes) %>">
  ...
</div>
Hooks are created in, or imported into, your app.js file.
const Hooks = {}
Hooks.BeforeUnload = {
  mounted() {
    var el = this.el
    this.beforeUnload = function(e) {
      if (el.dataset.changesMade === 'true') {
        e.preventDefault()
        e.returnValue = ''
      }
    }
    window.addEventListener('beforeunload', this.beforeUnload, true)
  },
  destroyed() {
    window.removeEventListener('beforeunload', this.beforeUnload, true)
  }
}
Notice that we access the data-changes-made attribute through this.el, which is made available to the hook.
BackHook #
This hook is used to signal a hook to do a browser back operation. This particular hook is used on an item edit page if the user decides to delete the item that is being edited. Since the item will no longer exist, we must take them back to a valid page.
We attach the BackHook to a template tag, because it doesn’t need to be associated with markup that will be rendered.
<template id="back-on-delete"
          phx-hook="BackHook"
          data-back-trigger="<%= @item_deleted %>"></template>
The data-back-trigger is set in the LiveView to initiate the back operation.
Hooks.BackHook = {
  updated() {
    // Go back when trigger evaluates to true
    if (this.el.dataset.trigger === 'true') {
      history.go(-1)
    }
  }
}
Integrating LiveView and AlpineJS #
LiveView JavaScript hooks will take us a long way, but sometimes we want more fine-grained control over our HTML markup. For that we can turn to AlpineJS. This article will discuss how to integrate LiveView with AlpineJS. For some more advanced examples, we will employ Spruce, a global store for AlpineJS, which will allow us to sync client-side data across Alpine components, LiveViews and LiveComponents on a single page.
AlpineJS #
AlpineJS is a perfect companion to LiveView for several reasons.
- It was created in conjunction with LiveWire, a LiveView clone for Laravel. Because the needs of LiveWire clients are very similar to those of LiveView clients, it is tailor-made to satisfy the needs of LiveView apps.
- It has similar features and syntax of Vue.js (and by extension Angular), yet it has a tiny footprint (~7kB gzipped). It can do that because it doesn’t maintain a virtual DOM, which adds complexity, leading to a larger code footprint.
- As of LiveView 0.13.3, LiveView uses the same mechanism as LiveWire to integrate with its client, preventing each from interfering with the other. The author of LiveWire and Alpine, Caleb Porzio, worked with Chris McCord to help make this happen. With this integration you typically do not need to use
phx-update="ignore"to fence off areas of AlpineJS code from LiveView. This works because Alpine gets access to each node in the DOM following LiveView’s updates. - Alpine has great support for CSS transitions, which is difficult to do from the server side. (I will be discussing this in detail in a follow on article.)
- You can track LiveView assigns in your AlpineJS code, which I will demonstrate in detail below.
From the GitHub issue that led to the AlpineJS integration:
A question you might have that I’d like to address:
- LiveView can’t work with Alpine because both are trying to control the DOM
That’s the beauty of Alpine, it doesn’t have a virtual DOM. It just makes normal DOM manipulations as needed. ALSO, it is extremely flexible, it won’t break if LiveView moves around an element with an Alpine directive. It will likely still work. This is thanks to MutationObserver and the way I handle DOM updates and event listeners. It was BUILT for something like LiveView.
…
I think a framework like LiveView has a ton to gain from something like Alpine.
Lots of small interactions don’t warrant a server-roundtrip and there are lots of other times you simply need to use JS and Alpine is the JS-swiss-army-knife for the job.
- Caleb Porzio (creator of AlpineJS and LiveWire)
AlpineJS allows you to add sprinkles of JavaScript code directly to your HTML markup. In fact, it is sometimes described as Tailwind for JavaScript. And it interacts seamlessly with your LiveView Hooks.
I will try to explain what is happening as we go along, but this isn’t meant to be an AlpineJS tutorial. For that you can get started by reading the Alpine Readme on Github, checking out some intro articles, and doing the AlpineJS tutorial on Scrimba.
That said, here is a simple AlpineJS component:
<div x-data="{ isOpen: true }">
  <button @click=" isOpen = !isOpen">Toggle</button>
  <h1 x-show="isOpen">index.html</h1>
</div>
The x-data attribute declares a new Alpine component scope on an element. Any nested elements are part of the scope and have access to the x-data properties. You initialize x-data with a Javascript object that can include both data and functions. In this example, the component is initialized with an isOpen property initialized to true.
The @click attribute on the button is a click handler. You can associate one or more JavaScript statements with the click handler. In this case, when the button is clicked, isOpen will be toggled.
And finally, the x-show attribute will show or hide the element it is declared on according to whether the JavaScript statement associated with it resolves to true or false. So in this case the heading will toggle on and off as the user clicks the button.
Important #
Before you get started with AlpineJS you will need to make an addition to your LiveSocket declaration in app.js. Specifically, add the dom property to the LiveSocket initialization as shown below. This is the magic incantation that will allow LiveSocket and AlpineJS to work together.
let liveSocket = new LiveSocket('/live', Socket, {
  dom: {
    onBeforeElUpdated(from, to) {
      if (from.__x) {
        window.Alpine.clone(from.__x, to)
      }
    }
  },
  params: {
    _csrf_token: csrfToken
  },
  hooks: Hooks
})
Example Premise #
We are going to use a simple LiveView in the rest of our examples. It is a counter with increment and decrement event handlers.
defmodule DemoWeb.CounterLive do
  use DemoWeb, :live_view

  def mount(_params, _session, socket) do
    {:ok, assign(socket, count: 0)}
  end

  def handle_event("increment", _params, socket) do
    {:noreply, update(socket, :count, &(&1 + 1))}
  end

  def handle_event("decrement", _params, socket) do
    {:noreply, update(socket, :count, &(&1 - 1))}
  end
end
The LiveView’s markup will be variations on:
<div id="counter">
  <h1>The count is: <span><%= @count %></span></h1>
  <button phx-click="decrement"> Decrement </button>
  <button phx-click="increment"> Increment </button>
</div>
It will work like this:

Integrating Alpine Components with LiveView via Hooks #
Alpine code can interact with your LiveViews by proxy via hooks. Alpine code can call hook functions directly or communicate using JavaScript custom events. (Note that, Alpine components can also communicate with each other using custom events.)
Calling Hook code #
You can call hook code directly by attaching your hook to window. This makes your JavaScript hook functions available globally from anywhere in your Alpine code. You wouldn’t want to call the reserved lifecycle functions, like mount, update, and such directly, but you can call any other functions on your hook.
In this example we will forego phx-click to respond to the button clicks and instead use Alpine @click events. You wouldn’t typically do this in practice, but it serves to demonstrate a point.
In this example, when the buttons are clicked they call hook functions on a hook that has been attached to window. The hook functions use pushEvent and pushEventTo to send events to the LiveView. pushEvent will send the event to whatever LiveView is associated with the element on which the hook is attached. And pushEventTo allows you to push the event to a different LiveView or LiveComponent by specifying a selector in its scope. We use both to show how it is done in either case.
<div id="counter"
     phx-hook="Counter"
     x-data="{}">
  <h1>The count is: <span><%= @count %></span></h1>
  <button @click="counterHook.decrement()">
    Decrement
  </button>
  <button @click="counterHook.increment('#counter')">
    Increment
  </button>
</div>
Hooks.Counter = {
  mounted() {
    window.counterHook = this
  },
  decrement() {
    this.pushEvent('decrement', {})
  },
  increment(selector) {
    this.pushEventTo(selector, 'increment', {})
  }
}
Calling LiveView pushEvent from Alpine via Hook #
Because the pushEvent and pushEventTo are functions available on hooks, you can call them directly from Alpine components via your window registered hooks.
<div id="counter"
     phx-hook="PushEvent"
     x-data="{}">
  <h1>The count is: <span><%= @count %></span></h1>
  <button @click="pushEventHook.pushEvent('decrement', {})">
    Decrement
  </button>
  <button @click="pushEventHook.pushEventTo('#counter', 'increment', {})">
    Increment
  </button>
</div>
Hooks.PushEvent = {
  mounted() {
    window.pushEventHook = this
  }
}
Sending JavaScript Events from Alpine to Hooks #
I prefer to call hook functions directly, like we saw above, but you can also communicate with hooks via JavaScript custom events.
In this example, we will create a general ‘message broker’ hook to pass events from Alpine components on to backend LiveViews, essentially doing the same thing as we did in the previous example, but with a lot more code.
<div id="counter"
      phx-hook="LiveViewPushEvent"
      x-data="{}">
  <h1>The count is: <span><%= @count %></span></h1>
  <button @click="$dispatch('liveview-push-event', {
                    event: 'decrement',
                    payload: {}
                  })">
    Decrement
  </button>
  <button @click="$dispatch('liveview-push-event-to', {
                    selector: '#counter',
                    event: 'increment',
                    payload: {}
                  })">
    Increment
  </button>
</div>
Hooks.LiveViewPushEvent = {
  mounted() {
    const liveView = this
    this.liveViewPushEvent = function(e) {
      liveView.pushEvent(e.detail.event, e.detail.payload)
    }
    this.liveViewPushEventTo = function(e) {
      liveView.pushEventTo(e.detail.selector, e.detail.event,
        e.detail.payload)
    }
    window.addEventListener('liveview-push-event',
      this.liveViewPushEvent)
    window.addEventListener('liveview-push-event-to',
      this.liveViewPushEventTo)
  },
  destroyed() {
    window.removeEventListener('liveview-push-event',
      this.liveViewPushEvent)
    window.removeEventListener('liveview-push-event-to',
      this.liveViewPushEventTo)
  }
}
Sending JavaScript Events from Hooks to Alpine #
We can send JavaScript events from hooks to Alpine components as well.
In this example, we will send count update events from a hook to an AlpineJS event handler.
Hooks.CounterShadowEvent = {
  updated() {
    var count = this.el.getAttribute('count')
    var event = new CustomEvent('count-updated', {
      detail: {
        count: count
      }
    });
    this.el.dispatchEvent(event);
  }
}
From the hook, we send a JavaScript custom event every time the counter is updated. In the hook’s update function we get the count, which is an attribute of the element on which it is attached. The count attribute is initialized with the @count assign, so the hook’s update lifecycle function will be called every time the count is updated in the LiveView.
<div id="counter"
     phx-hook="CounterShadowEvent"
     count=<%= @count %>>
  <div x-data="{count: 0}"
       x-on:count-updated="count = $event.detail.count">>
    <h1>The assigns count is: <span><%= @count %></span></h1>
    <h1>The alpine count is: <span x-text="count"></span></h1>
    <button phx-click="decrement"> Decrement </button>
    <button phx-click="increment"> Increment </button>
  </div>
</div>
The Alpine component registers a count-updated listener that updates the count from the event details. As the count updates, the h1 displaying the Alpine count changes in unison.
Accessing LiveView Assigns in Alpine Code #
Typically you can’t access a LiveView assign in AlpineJS code. It can’t see it.
For example, this won’t work:
<div id="counter"
      x-data="{}">
  <h1>The assign count in Alpine is:
    <span x-text="<% @count %>"></span>
  </h1>
  <button phx-click="decrement"> Decrement </button>
  <button phx-click="increment"> Increment </button>
</div>
But there is a simple solution that will allow us to track changes in LiveView assigns in our AlpineJS code as they happen.
Shadowing LiveView Assigns #
To track changes to LiveView assigns, you simply need to initialize an Alpine data property with that assign. By shadowing a LiveView assign in Alpine data, any changes to the assign are reflected in the Alpine property.
This works:
    <div id="counter"
         x-data="{count: <%= @count %>}">
      <h1>The assigns count is: <span><%= @count %></span></h1>
      <h1>The alpine count is: <span x-text="count"></span></h1>
      <button phx-click="decrement"> Decrement </button>
      <button phx-click="increment"> Increment </button>
    </div>

Watching and Reacting to LiveView Assigns #
You can watch shadowed LiveView assigns in Alpine and react to changes in the assign. This can be useful if you need to signal something to happen in client JavaScript code from the server.
Here is a preview of some code that we will be looking at in detail in a follow-on article.
<div id="<%= @id %>"
      phx-hook="Modal"
      x-data="{ open: false, close: <%= @close %> }"
      x-init="() => {
        setTimeout(() => open = true, 0);
        $watch('close', value => open = false)
        $watch('open', isOpen => {
          if (!isOpen) {
            modalHook.removeModal(<%= @leave_duration %>)
          }
        })
      }"
      x-show="open">
  ...
</div>
The @close assign is shadowed in an Alpine close property. We set up a $watch such that when close (and hence @close) changes to true, we set open to false. This triggers a second $watch that will remove the modal if it is not open. The modal is removed by calling the removeModal function on the window registered modalHook.
One caveat:
If you are using a
$watchto watch a property initialized from a LiveView assign, the LiveView-assigned property has to be last in the list ofx-dataproperties. (Or at least follow any properties that are dependent on it in a watch.) In the example above,openmust precedeclosein thex-dataobject becauseopenis assigned in a$watchonclose.
Adding and Removing DOM Nodes #
When integrating LiveView with most JavaScript libraries that modify the DOM, you need to fence off the library’s code from LiveView with the phx-update=“ignore” attribute. But with the support for AlpineJS added in LiveView 0.13.3, AlpineJS is an exception.
To demonstrate that we can add and remove DOM nodes in AlpineJS code, without the need for phx-update="ignore", we will modify our counter example to add and remove divs as the counter is incremented and decremented.
<div id="counter"
      x-data="{arr: [], count: <%= @count %>}"
      x-init="() => {
        $watch('count', value => {
          arr = Array.from({length:value},(v,k)=>k+1)
        })
      }">
  <h1>The assigns count is: <span><%= @count %></span></h1>
  <h1>The alpine count is: <span x-text="count"></span></h1>
  <button phx-click="decrement"> Decrement </button>
  <button phx-click="increment"> Increment </button>
  <template x-for="item in arr" :key="item">
    <div x-text="item"></div>
  </template>
</div>
Here we add a $watch that adds and removes elements from an array as the count is incremented and decremented. We then use x-for on a template element to iterate over the array and create one div per element. The effect is that divs will be added and removed from the DOM as the count changes

Publishing Shadowed Assigns to other LiveViews and LiveComponents #
We can use Alpine’s custom event capabilities to send shadowed assigns (or whatever we want) to AlpineJS components on other LiveViews and LiveComponents rendered on the same page.
Keep in mind that these are client-side only events. They will not be pushed to the server. To do that, use pushEvent through a hook as we saw earlier.
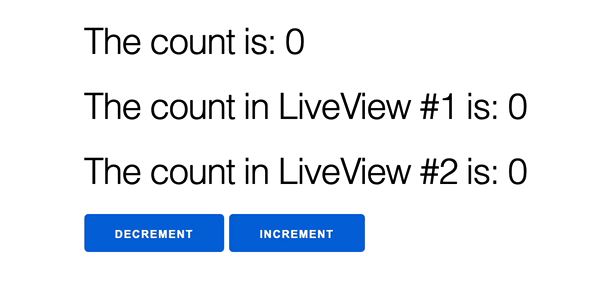
Here we set up a $watch that dispatches an event every time the count assign changes. We also live_render two subscriber LiveViews that will receive the count-changed events.
defmodule DemoWeb.CounterEventPubLive do
  use DemoWeb, :live_view

  def mount(_params, _session, socket) do
    {:ok, assign(socket, count: 0)}
  end

  def handle_event("increment", _params, socket) do
    {:noreply, update(socket, :count, &(&1 + 1))}
  end

  def handle_event("decrement", _params, socket) do
    {:noreply, update(socket, :count, &(&1 - 1))}
  end

  def render(assigns) do
    ~L"""
    <div id="counter"
         x-data="{count: <%= @count %>}"
         x-init="
           $watch('count', (value) => {
             $dispatch('count-changed', {count: value})
           })
         ">
      <h1>The count is: <span><%= @count %></span></h1>
      <%= live_render(@socket, DemoWeb.CounterEventSubLive, id: "1") %>
      <%= live_render(@socket, DemoWeb.CounterEventSubLive, id: "2") %>
      <button phx-click="decrement"> Decrement </button>
      <button phx-click="increment"> Increment </button>
    </div>
    """
  end
end
The subscriber LiveViews listen for the count-changed events and display the updated value.
defmodule DemoWeb.CounterEventSubLive do
  use DemoWeb, :live_view

  def mount(params, session, socket) do
    {:ok, assign(socket, id: socket.id)}
  end

  def render(assigns) do
    ~L"""
    <div id="sub-<%= @id %>"
         x-data="{count: 0}"
         @count-changed.window="count = $event.detail.count">
    <h1>The count in LiveView #<%= @id %> is:
      <span x-text="count"></span>
    </h1>
    </div>
    """
  end
end
To learn more about communicating between AlpineJS components, this article has a good discussion.
Interacting via a Global Store #
Finally, we will look at tracking LiveView assigns through a global store. This will allow us to access shadowed assigns across all the elements in a document and across all the LiveView and LiveComponents mounted on a page. To accomplish this we will use an AlpineJS add-on called Spruce.
Spruce #
Spruce is a global state management solution that integrates with AlpineJS.
You declare a store in your app.js file and then read from and write to it throughout your markup.
Here’s an example from the documentation.
Say you define a store in your app.js as:
Spruce.store('modal', {
  open: 'login',
});
Then you can access it just like any data defined in an x-data object in your AlpineJS component. To access the store you define an Alpine component scope with x-data="{}" and use the special x-subscribe attribute, which gives you access to the $store magic property.
<div x-data="{}" x-subscribe>
  <div x-show="$store.modal.open === 'login'">
    <p>
      This "login" modal isn't built with a11y in mind, don't use it
    </p>
  </div>
</div>
Subscribing to Assigns across Alpine Components #
We can use this to follow assigns in a single document. We will first define our store in app.js.
Spruce.store('application', {
  count: 0
})
Then in our markup we will define a template tag that we will use to watch the count assign and add it to our global store. We will access the shadow count as before, but this time through the global store, rather than a local x-data property.
  <div id="counter"
        x-data="{}"
        x-subscribe>
    <h1>The count is: <span><%= @count %></span></h1>
    <h1>The stored count is:
      <span x-text="$store.application.count"></span>
    </h1>
    <button phx-click="decrement"> Decrement </button>
    <button phx-click="increment"> Increment </button>
  </div>

  <template x-data="{count: <%= @count %>}"
            x-subscribe
            x-init="
              $watch('count', (value) => {
                $store.application.count = value
              })
            "></template>

Subscribing to Assigns across Alpine Components and LiveViews #
We can take this a step further and access the global store in multiple LiveViews and LiveComponents rendered on a page.
Here we have a subscriber LiveView that never sees the @count assign at all, but can access the shadow count in its markup through the global store.
defmodule DemoWeb.CounterSubscribeSubLive do
use DemoWeb, :live_view
def mount(params, session, socket) do
{:ok, assign(socket, id: socket.id)}
end
def render(assigns) do
~L"""
<div id="sub-<%= @id %>"
x-data="{}"
x-subscribe>
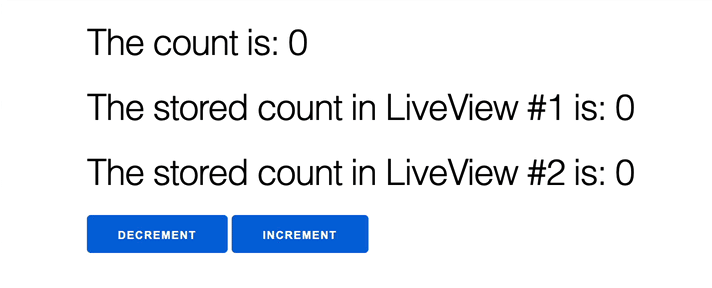
<h1>The stored count in LiveView #<%= @id %> is:
<span x-text="$store.application.count"></span>
</h1>
</div>
"""
end
end
Then in our primary counter LiveView we live_render a couple of these LiveViews and can see that they reflect the @count assign as it is added to the store in the primary counter LiveView.
defmodule DemoWeb.CounterSubscribePubLive do
  use DemoWeb, :live_view

  def mount(_params, _session, socket) do
    {:ok, assign(socket, count: 0)}
  end

  def handle_event("increment", _params, socket) do
    {:noreply, update(socket, :count, &(&1 + 1))}
  end

  def handle_event("decrement", _params, socket) do
    {:noreply, update(socket, :count, &(&1 - 1))}
  end

  def render(assigns) do
    ~L"""
    <div id="pub">
      <h1>The count is: <span><%= @count %></span></h1>
      <%= live_render(@socket, DemoWeb.CounterSubscribeSubLive, id: "1") %>
      <%= live_render(@socket, DemoWeb.CounterSubscribeSubLive, id: "2") %>
      <button phx-click="decrement"> Decrement </button>
      <button phx-click="increment"> Increment </button>
    </div>

    <template x-data="{count: <%= @count %>}"
              x-subscribe
              x-init="
                $watch('count', (value) => {
                  $store.application.count = value
                })
              "></template>
    """
  end
end
Interacting with Store Shadowed Assigns in your Hooks #
Finally, you can access the global object through arbitrary JavaScript code, including your hooks. You can both set global data and watch for changes in global data.
I’ll leave this as an exercise for you, but here is an example from the documentation:
Spruce.store('form', {
    name: 'Ryan',
    email: 'support@ryangjchandler.co.uk'
})

Spruce.watch('form.email', (old, next) => {
    // do something with the values here
})
Thats It! #
We explored a couple JavaScript hook examples and then saw how
AlpineJS works hand in glove with LiveView, allowing you to access LiveView assigns in your Alpine code and communicate between LiveView hooks and Alpine. We will explore LiveView and AlpineJS integration further in our next article where we will create a fully styled modal that smoothly transitions in and out of view.
In our next article we explore creating LiveView modals with transitions using Tailwind CSS and AlpineJS.
Thanks to Ben Wilson, Benjamin Milde, Henrik Nyh, Alex McLain, Jon Rowe, Jim Freeze, and Sviatoslav Bulbakha for their feedback.